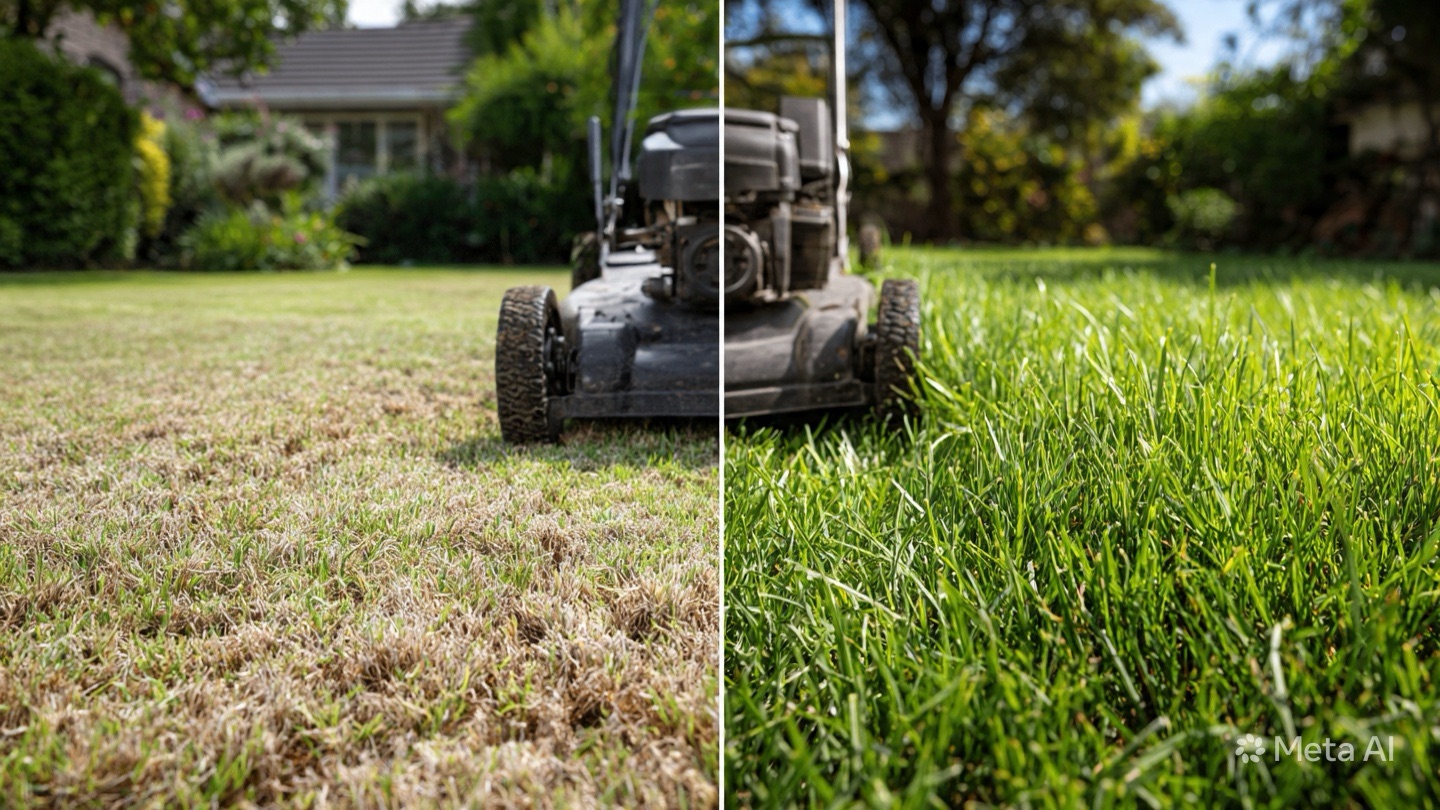
Daylilies (Hemerocallis) are beloved for their resilience and dazzling blooms, but overcrowded clumps can stifle their potential. Dense growth leads to root competition, limiting access to nutrients and water, which results in smaller flowers and increased vulnerability to pests like aphids and diseases such as crown rot. According to the University of Minnesota Extension, dividing daylilies every 3–5 years improves airflow, reduces fungal infections, and revitalizes blooming.
Take inspiration from Maria, a gardener in Phoenix, AZ, who noticed her ‘Stella de Oro’ daylilies had stopped thriving after a decade. “The center of the clump was dead, and blooms were sparse,” she recalls. After dividing the plants in early spring, Maria not only revived her garden but also donated divisions to a local community garden. “Now, my daylilies are the talk of the neighborhood—lush, healthy, and covered in golden blooms,” she says.
When to Divide Daylilies: Perfect Timing for Success
Timing is critical to ensure minimal stress and maximum recovery. Daylilies respond best when divided during two key periods:
- Early Spring: As soon as new green shoots (fans) emerge, the cool, moist soil supports rapid root establishment.
- Late Summer/Early Fall: After blooming ends, aim for 6–8 weeks before your region’s first frost. This allows roots to anchor before winter dormancy.
Regional Adjustments:
- Hot, Arid Climates (e.g., Las Vegas, NV): Divide in late February or early March to avoid scorching summer temperatures.
- Cool, Northern Zones (e.g., Minneapolis, MN): Opt for April or late August to leverage mild weather.
- Humid Regions (e.g., New Orleans, LA): Spring division prevents root rot in soggy fall soils.
Pro Tip: The Old Farmer’s Almanac’s frost date tool can help pinpoint the ideal window for your area. Avoid dividing during flowering, as the plant’s energy is directed toward blooms, not root development.

Essential Tools for Effortless Division
Equipping yourself with the right tools ensures clean cuts and healthy transplants:
- Sharp Spade or Garden Fork: A sharp edge slices through tough roots cleanly, reducing damage. A garden fork is ideal for prying apart dense clumps without tearing.
- Pruning Knife or Handsaw: Sterilize with a 10% bleach solution to prevent disease spread. For gardeners without specialized tools, a serrated bread knife works in a pinch!
- Gardening Gloves: Choose puncture-resistant gloves to protect hands from fibrous roots and soil-borne microbes.
- Watering Can or Hose: Hydrate plants 24 hours before digging and maintain moisture post-division.
- Compost or Aged Manure: Enrich planting holes to boost nutrient availability.
Pro Tip: For stubborn, mature clumps, insert two garden forks back-to-back into the center and lever them apart—a technique recommended by the American Daylily Society.
Step-by-Step Guide to Dividing Daylilies
- Prep the Plant: Water deeply the day before digging to soften soil and hydrate roots.
- Trim Foliage: Cut leaves to 6–8 inches using pruning shears. This reduces water loss and makes handling easier.
- Dig the Clump: Circle the plant 8–10 inches from the base, angling the spade downward to lift the entire root ball.
- Shake Off Soil: Gently rinse roots with a hose to expose natural divisions (individual fans).
- Divide the Clump:
- Small Clumps: Twist fans apart by hand, ensuring each has 3–5 healthy stems and a robust root system.
- Large, Woody Clumps: Use a knife to slice vertically through the crown. Discard dead center sections.
- Trim Roots: Prune damaged or excessively long roots to 6 inches to encourage new growth.
- Replant: Dig holes twice the width of the root system. Position fans at their original depth, spacing 18–24 inches apart.
- Water and Mulch: Soak the soil thoroughly and apply 2 inches of mulch (e.g., straw or shredded bark) to retain moisture.
In Denver, CO, landscaper Jake struggled with his ‘Happy Returns’ daylilies until he adopted a fall division routine. “I mix compost tea into the soil after replanting,” he shares. “The divisions establish quickly, and by next summer, they’re bursting with blooms.”
Spring vs. Fall Division: Pros and Cons
| Factor | Spring | Fall |
|---|---|---|
| Weather | Cool, rainy; ideal for root growth | Mild days, cool nights |
| Bloom Impact | Slightly delayed summer blooms | Full blooms the following year |
| Best For | Fast recovery, quick establishment | Overcrowded or declining clumps |
| Risk | Late frost damaging new growth | Early freeze stunting roots |
| Ideal Varieties | Rebloomers (e.g., ‘Purple d’Oro’) | Dormant types (e.g., ‘Chicago Apache’) |
Expert Insight: The American Daylily Society notes that fall division is ideal for older clumps with dead centers, as cooler temperatures reduce stress on mature plants.
5 Common Mistakes (and How to Avoid Them)
- Dividing Too Small:
- Mistake: Single-fan divisions lack energy reserves.
- Fix: Ensure each division has 3–5 fans and ample roots.
- Poor Soil Prep:
- Mistake: Replanting in compacted, nutrient-poor soil.
- Fix: Amend soil with 2–3 inches of compost or well-rotted manure.
- Overcrowding:
- Mistake: Planting divisions too close, repeating the cycle.
- Fix: Space plants according to mature spread (12–36 inches, depending on cultivar).
- Ignoring Water Needs:
- Mistake: Letting soil dry out during the critical 4-week establishment phase.
- Fix: Water every 2–3 days, or install drip irrigation for consistency.
- Wrong Timing:
- Mistake: Dividing in midsummer heat or during flowering.
- Fix: Stick to spring or fall windows, even if it means waiting a season.
Troubleshooting Daylily Divisions
- Wilting Fans: Trim foliage by half and water deeply. Shield from midday sun with shade cloth for 1–2 weeks.
- Yellow Leaves: Often a sign of overwatering. Improve drainage by mixing sand into soil.
- Pests: Aphids and spider mites target stressed plants. Apply neem oil or insecticidal soap weekly.
- No Blooms: Young divisions may take 1–2 years to flower. Ensure they receive 6+ hours of sunlight.
Pro Tip: Dust cut roots with cinnamon—a natural antifungal—or dip them in a solution of 1 part hydrogen peroxide to 9 parts water to prevent rot.
Sustainability and Community Impact
Dividing daylilies is a cornerstone of eco-friendly gardening:
- Reduce Waste: Share extras at local plant swaps instead of composting healthy divisions.
- Cut Carbon Footprint: Propagating your plants reduces reliance on nursery-grown specimens shipped in plastic pots.
- Boost Biodiversity: Healthy daylilies attract pollinators—their trumpet-shaped blooms are magnets for bees, butterflies, and hummingbirds.
In Portland, OR, the annual “Bloom Exchange” event diverts over 500 plants from landfills each year. “It’s not just about gardening,” says organizer Clara Nguyen. “It’s about building connections and reducing our environmental impact.”
Real-Life Success Stories
- Austin’s Urban Oasis: Emily, a novice gardener, transformed her sunbaked driveway by dividing ‘Pardon Me’ daylilies. “I started with six plants and now have 30,” she says. “They thrive with minimal water, even in Texas heat!”
- Michigan’s Bloom Boom: Retiree Carl splits his ‘Hyperion’ daylilies every five years, donating divisions to a local school. “The kids learn about gardening, and we’ve created a butterfly habitat,” he explains.
FAQs Answered by Horticulturists
Q: Can I divide daylilies in bloom?
A: Avoid it—wait until flowers fade to avoid draining the plant’s energy.
Q: How often should I divide daylilies?
A: Every 3–5 years, or when blooms diminish and centers die back.
Q: Can divisions grow in pots?
A: Yes! Use a 12-inch pot with drainage holes and well-draining soil. Keep pots shaded until roots establish.
Q: What if my divisions aren’t growing?
A: Patience is key! Divisions focus on root growth first. Fertilize lightly with a balanced 10-10-10 formula in spring.
Q: How do I protect divisions from deer?
A: Spray plants with a repellent containing putrescent egg solids, or plant deer-resistant companions like lavender nearby.
Final Thoughts
Dividing daylilies is a rewarding ritual that breathes new life into your garden. Whether you’re in the humid South or the frosty North, this practice ensures vibrant, sustainable blooms for years to come. Grab your tools, embrace the rhythm of the seasons, and let your daylilies shine—one division at a time.